
This tutorial will show you how to get Windows 7 to display menus, icons, and messages in Japanese. This is different from Japanese input. For Japanese input please refer to the Japanese Input on Windows 7 tutorial.
There are many steps involved, but you don’t need a Windows install CD like Windows XP required. There are three main steps:
- Install Japanese language pack
- Set the display language to Japanese
- Set additional menus to Japanese
Install Japanese Language Pack
To get Japanese menus, first we need to download the Japanese language pack using Windows Update.
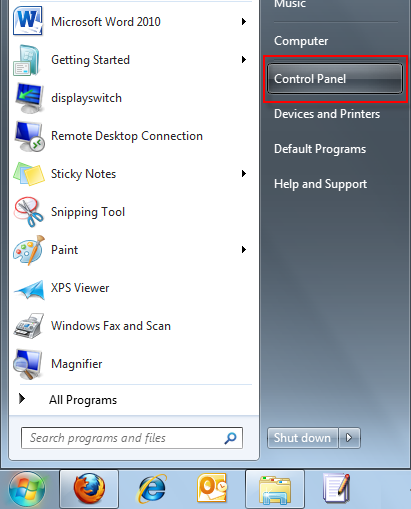
To start, press the Windows button to open the Start menu.
![]()
On the Start menu, select Control Panel.
On the Control Panel screen, select System and Security. If you don’t see this option at first, change the View by: option at the top right of the screen to Category.
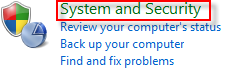
On the System and Security screen, press Windows Update.
![]()
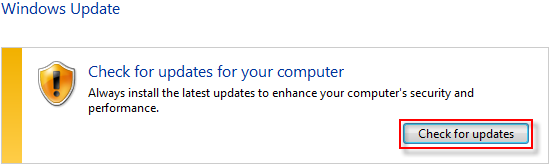
On the Windows Update screen, press Check for updates.
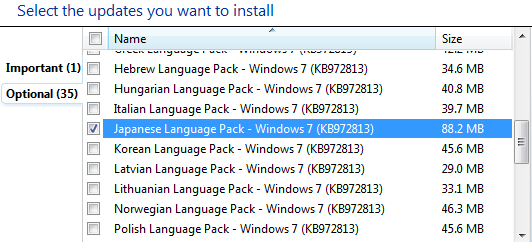
After a few moments, Windows Update will display the updates available for your computer. Select optional updates are available. (If you have important updates, you should also come back and update those when you are finished).

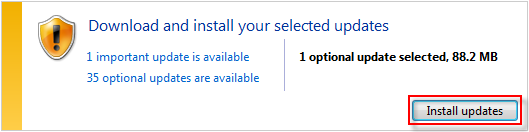
On the Select the updates you want to install screen, you should see Windows 7 Languages Packs under the Optional updates, which appears under the Important updates. Scroll down and select the Japanese Language Pack – Windows 7 optional update and press OK.
On the Windows Update screen, press Install updates to begin installing the Japanese Language Pack.
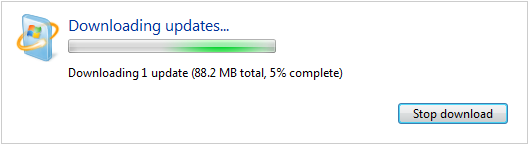
Wait a few moments while the language pack update downloads.
After the download completes, wait a few moments while the language pack update installs.
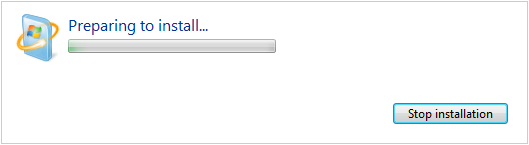
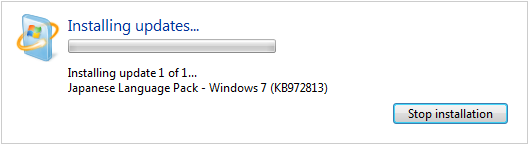
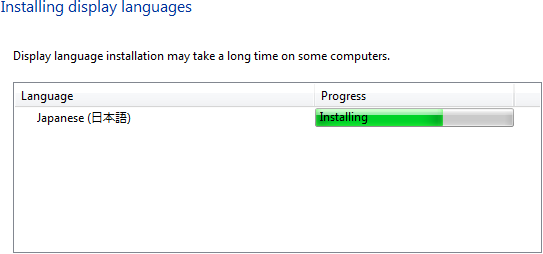
A pop window, the Install or uninstall display languages screen, will show the installation progress. As it notes, display language installation may take a long time on some computers. It took approximately 10 minutes on my Core i5 laptop.
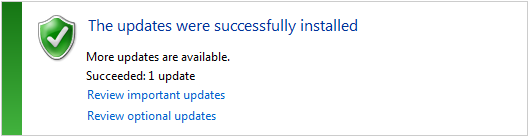
When installation is complete, the Windows Update screen will show a successfully installed message.
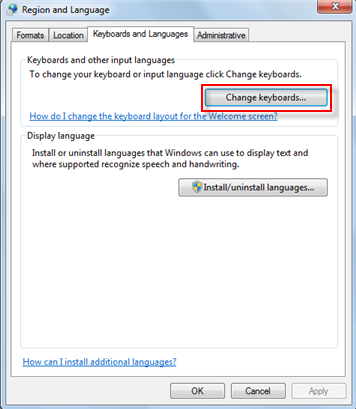
Set the Display Language to Japanese
To start, press the Windows button to open the Start menu.
On the Start menu, select Control Panel.
On the Control Panel screen, under Clock, Language, and Region, select Change display language. If you don’t see this option at first, change the View by: option at the top right of the screen to Category.

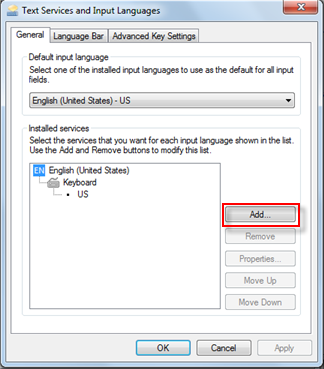
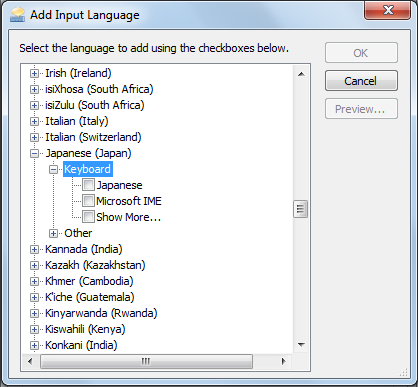
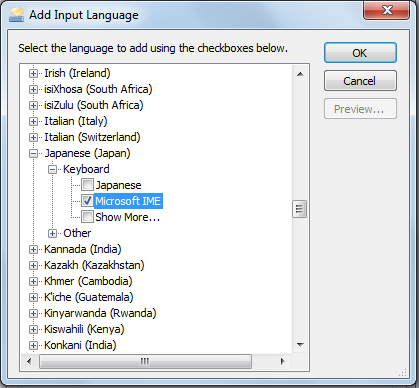
On the Keyboards and Languages tab, click on the Choose a display language drop down menu. You should now have the option for Japanese, displayed as 日本語.
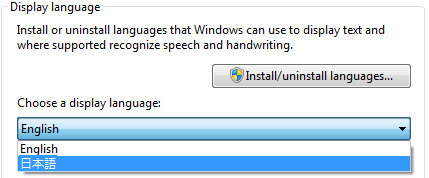
Select 日本語 and press OK.
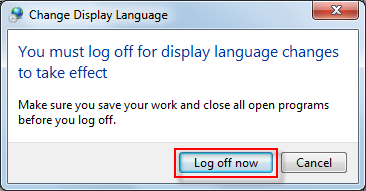
You will be prompted to log off for the display language changes to take effect. Press Log off now.
Windows will log you out. Log back in as you normally do.
Windows 7 will now display menus, icons, and messages in Japanese.
Some applications, such as Internet Explorer, will automatically change to Japanese display menus. However, some applications may still be in English. You may be able to get these to display in Japanese by changing the Windows region to Japan via the Control Panel, or by changing specific settings within the application itself.
Set Additional Menus to Japanese
As you may have noticed when you logged in, the Welcome screen and message were still in English. To change this to Japanese as well do the following:
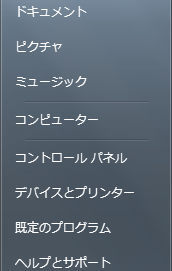
On the Start menu, select コントロール パネル (Control Panel).
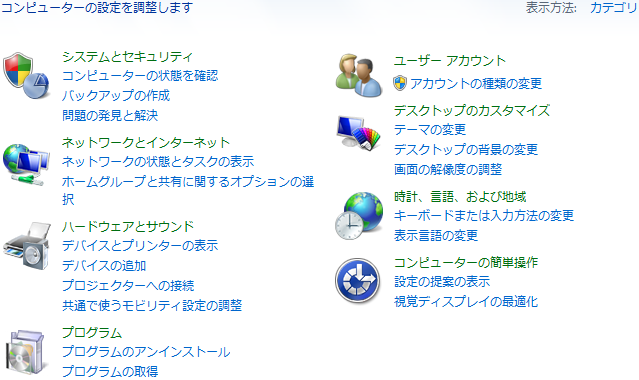
On the コントロール パネル (Control Panel) screen, under 時計、言語、および地域 (Clock, Language, and Region), select キーボードまたは入力方法の変更 (Change display language). If you don’t see this option at first, change the View by: option at the top right of the screen to カテゴリ (Category).
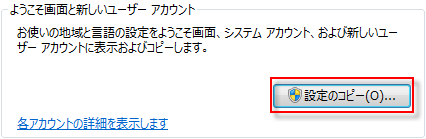
On the 管理 (Administrative) tab, under the ようこそ画面と新しいユーザー アカウント (Welcome screen and new user accounts) area, press 設定のコピー (Copy settings).
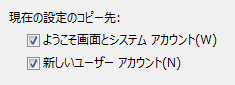
On the ようこそ画面と新しいユーザー アカウント (Welcome screen and new user accounts) dialog box, select ようこそ画面とシステム アカウント (Welcome screen and system accounts) and 新しいユーザーアカウント (New user accounts) and press OK.
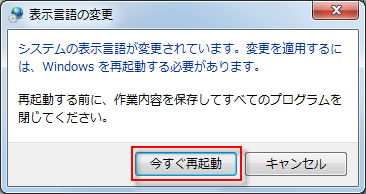
You will be prompted to reboot for the changes to take effect. Press 今すぐ再起動 (Restart now).
Windows 7 will restart. When it boots up, the start up, user log in, and welcome screens will now be in Japanese.
That’s it. Now you have all your Windows 7 menus and messages in Japanese.