Archive for the ‘Linux’ Category

Japanese Input on Ubuntu Linux 12-04 LTS Precise Pangolin

Tuesday, May 29th, 2012

This tutorial will show you how to set up Japanese input IME (日本語入力方法) on Ubuntu Linux 12.04 from the Unity interface. The installation procedure is very similar to the previous Unity release of Ubuntu 11-10.

Setup Procedure

To start, select Dash home from the Unity Launcher.

From the Dash home, search for Language Support.

Select Language Support.

On the Language tab of the Language Support screen, press Install / Remove Languages…

On the Installed Languages screen, scroll down to Japanese and check Installed, and then press Apply Changes.

Enter your password on the Authenticate screen.

It will take a few moments to download and install the Japanese IME packages.

Back on the Language Support screen, select ibus for the Keyboard input method system, and then press Close.

Once again select Dash home from the Unity Launcher.

From the Dash home, search for Keyboard Input Methods.

Select Keyboard Input Methods.

You may get a pop up message saying Keyboard Input Methods (IBus Daemon) has not been started. Do you want to start it now? Select Yes.

On the Input Method tab of the Ibus Preferences screen, select the Customize active input methods check box.

Press Select an input method and select Japanese → Anthy.

Press Add and then press Close.

The Ibus keyboard icon will now display on the top panel.

Open up any application with a text box such as gedit and place the cursor in the text box.

Press the Ibus keyboard icon on the tap panel and select Japanese-Anthy.

The Ibus keyboard icon will now change to the Anthy Aち icon.

That’s it. You can now type in Japanese in Ubuntu 12.04. 難しくない手順ですね。

Japanese Input on OpenSUSE Linux 12.1 (KDE 4.7)

Tuesday, December 6th, 2011

Setting up Japanese input IME (日本語入力方法) on openSUSE Linux 12.1 is not difficult, but it requires a little know-how of what packages need to be installed. It only takes a few minutes to download all the files and get it set up. Once installed and configured, you will be able to type in Japanese in your Linux applications. If you’ve used the previous 11.4 version of openSUSE, it’s exactly the same, although some icons look a little different.

Prerequisites

  • YaST software repositories are configured properly.

Setup Procedure

Click on the Kickoff Application Launcher.

On the Computer tab, click Install/Remove Software.

On the Search tab, search for anthy.

In the search results window showing the matching packages, select the anthy and ibus-anthy packages.

Press the Accept button on the bottom right of the window.

YaST will now download, install, and configure the anthy packages.

Do the same for ibus. Open Install/Remove Software, search for ibus, and select the package for ibus. Press Accept to install.

Click on the Kickoff Application Launcher, and from the Leave tab, click Restart to restart openSUSE with the new configuration.


After restarting, log back in.

You will now have the IBus input method framework keyboard icon in the bottom panel.

Right click the IBus input method framework keyboard icon and click on Preferences.

On the Input Method tab, select Japanese → Anthy from the dropdown menu.

Press the Add button to add Japanese Anthy input method, and then press Close.

Open up a text editor or any application with a text input window, and click on the IBus input method framework icon and select Japanese – Anthy.

The IBus input method framework keyboard icon will change to the Anthy Aち icon.

You can now type in Japanese.

Click the Anthy Aち icon to select between the various Japanese input modes.

That’s it. Setting up Japanese input on openSUSE 12.1 is not very difficult. When you try to type Japanese, make sure the cursor is in a text box in an application, or you may get an error saying No input window. 日本語入力方法を楽しんでください。

Japanese Input on Linux Mint 12 Lisa

Saturday, December 3rd, 2011

This tutorial will show you how to set up and install Japanese input method IME (日本語入力方法) on Linux Mint 12 Lisa so you can type in Japanese. Linux Mint is quickly becoming one of the more popular Linux distributions. Linux Mint 12 comes in a Gnome 2 and Gnome 3 variety. This tutorial works for either version, however, the menus look a little different in Gnome 2.

Linux Mint 12 Japanese IME Setup Procedure

Click on the Mint Menu and navigate to Other → Software Manager.

In the Software Manager, search for ibus.

Select ibus.

Click Install.

In the Authentication Required dialog box, enter your system password and press Authenticate.

Software Manager will now download and install IBus in the background.

While IBus is installing, search for anthy.

Select ibus-anthy and click Install.

In the Authentication Required dialog box, enter your system password and press Authenticate.

Software Manager will now download and install ibus-anthy in the background.

When the activity bar on the bottom shows 0 ongoing actions, installation is complete.

Close Software Manager.

From the Mint Menu, navigate to System Tools → System Settings.

Open Language Support.

Note: If language support was not installed during the Mint install process you may get a pop up dialog indicating that the language support is not installed completely. In that case, select Install to install the language support. In the Authentication Required dialog box, enter your system password and press Authenticate. The Applying changes screen will display and show the installation progress. When the language support has been fully installed, the Language Support screen will display.

On the Language Support screen, select Install / Remove Languages….

Scroll down and check Japanese, and then press Apply Changes.

On the Language Support screen, press the Keyboard input method system: drop down and select ibus.

Then press Close.

Click on the Mint Menu and select System Tools → IBus.

You should now have the little IBus keyboard icon displayed somewhere on the right side of your Gnome top panel.

Click on the IBus keyboard icon and select Preferences.

On the IBus Preferences screen, go to the Input Method tab.

Press the Select an input method dropdown and select JapaneseAnthy.

Press Add on the IBus Preferences screen to add the Anthy Japanese input method.

Open a text application like Text Editor. While the cursor is in the text field, press the Ibus keyboard icon in the top panel and select Japanese – Anthy.

The Japanese Anthy toolbar should appear and you can now type in Japanese. Place the cursor in a text input application like Text Edit and try to type in Japanese.

That’s all there is to it. Linux Mint is known to be a very easy to use distribution, but it takes quite a few more steps to install Japanese input than the latest versions of Ubuntu or Fedora.

Note: I had issues with the Anthy toolbar not appearing and instead showed this icon which usually means no input window found. But, I could still type in Japanese in this mode, so no worries if this happens to you.

Note: I had trouble when trying to add Japanese on the Install / Remove Languages screen. It worked fine in the Gnome 2 version of Mint 12 I installed in a virtual machine, but it gave a Software database is broken error message in the Gnome 3 version of Mint 12 I installed on a physical laptop. I tried reinstalling twice but I kept getting the same problem. It may have been a problem with the laptop because I also had issues when trying to install drivers for the wireless card. I had no issues with Japanese input on Mint in a VM.

Japanese Input on Fedora 16 Linux (Gnome 3)

Saturday, November 12th, 2011

Setting up Japanese input (IME) on Fedora 16 Linux is really easy and only takes a few minutes.

Fedora still uses the IBus keyboard input method system and uses the Anthy Japanese input method for the Japanese keyboard input, so it will be a familiar process to set up and use if you have done it on earlier Fedora Linux distributions.

For previous versions of Fedora, refer to:

Fedora 16 Japanese IME Setup Procedure

To start, open Activities from the Top Panel.

In the Search Box, type Input Method and select the Input Method Selector.

In the Input Method Selector screen, select Use IBus (recommended).


Press the Preference… link to the right of Use IBus (recommended) to open the IBus Preferences screen.

On the Input Method tab, check the Customize active input methods check box.

Press the Select an input method dropdown and select Show all input methods.

Press the Select an input method dropdown once again and now select Japanese → Anthy.

Press the Add button, and then press Close.

You must log out for the changes to take effect, so press the Log Out button on the Input Method Selector screen.

When you log back in you will now have the IBus input method framework button on the Gnome top panel (It looks like a small keyboard). This is the button to change input modes. Open a text editor such as gedit or some other application with a text input window.

Press the IBus input method framework button and select Japanese – Anthy.

The keyboard icon has now changed to Aち, which shows the letter A and the hiragana character chi, which probably is trying to get something close the the pronunciation of Anthy while indicating Japanese/English input modes.

You should now be able to type in Japanese.

Use the Anthy Aち button to toggle between Japanese, English, and other Japanese IME modes.

Note: I did not have to log out and log back in for the changes to take effect to allow me to type in Japanese in Firefox. However, there may be applications that cannot take advantage of the IME changes until after logging out.

Note: If you get the message No input window when you try to select Japanese Anthy, make sure you have the mouse cursor in an application with a text input box, such as a text editor or a Web browser.

That’s it. You should be able to type in Japanese now. Setting up Japanese IME input on Fedora Linux is simple and very similar to previous versions of Fedora.

Japanese Input on Ubuntu Linux 11.10 Oneiric Ocelot

Sunday, October 16th, 2011

This tutorial will show you how to set up Japanese input (IME) on Ubuntu 11.10 from the Unity interface. The installation procedure is very similar to the previous Unity release of Ubuntu 11.04. In fact, it is a little bit easier on 11-10. For Ubuntu 10.04 under Gnome, refer to this post.

Setup Procedure

To start, select Dash home from the Unity Launcher.

From the Dash home, select More Apps.

From the Installed menu area, select See more results.

Scroll down and select Language Support.

On the Language tab of the Language Support screen, press Install / Remove Languages…

On the Installed Languages screen, scroll down to Japanese and check Installed, and then press Apply Changes.

Enter your password on the Authenticate screen.

It will take a few moments to download and install the Japanese IME packages.

Back on the Language Support screen, select ibus for the Keyboard input method system, and then press Close.

Once again select Dash home from the Unity Launcher.

From the Dash home, select More Apps.

From the Installed menu area, select See more results.

Scroll down and select Keyboard Input Methods.

You may get a pop up message saying Keyboard Input Methods (IBus Daemon) has not been started. Do you want to start it now? Select Yes.

On the Input Method tab of the Ibus Preferences screen, press Select an input method and select Japanese → Anthy.

Press Add and then press Close.

The Ibus keyboard icon will now display on the top panel.

Open up any application with a text box such as Tomboy Notes and place the cursor in the text box.

Press the Ibus keyboard icon on the tap panel and select Japanese-Anthy.

The Ibus keyboard icon will now change to the Anthy Aち icon.

That’s it. You can now type in Japanese in Ubuntu 11.10. 簡単にできますね。

Japanese Input on OpenSUSE Linux 11.4 (KDE 4.6)

Monday, October 3rd, 2011

Setting up Japanese input on OpenSUSE Linux is not difficult, but it requires knowing what to install and when to restart the Linux system. It only takes a few minutes to download all the files and get it set up. Once installed and configured, you will be able to input Japanese characters and type Japanese and English whenever you want.

Prerequisites

  • YaST software repositories are configured properly.

Setup Procedure

Click on the Kickoff Application Launcher.

On the Computer tab, click Install/Remove Software.

On the Search tab, search for anthy.

In the search results window showing the matching packages, select the anthy and ibus-anthy packages.

Press the Accept button on the bottom right of the window.

YaST will now download, install, and configure the anthy packages.

Do the same for ibus. Open Install/Remove Software, search for ibus, and select the package for ibus. Press Accept to install.

Click on the Kickoff Application Launcher, and from the Leave tab, click Restart to restart openSUSE with the new configuration.


After restarting, log back in.

You will now have the IBus input method framework icon in the bottom panel.

Right click the IBus input method framework icon and click on Preferences.

On the Input Method tab, select Japanese → Anthy from the dropdown menu.

Press the Add button to add Japanese Anthy input method, and then press Close.

Open up a text editor or any application with a text input window, and click on the IBus input method framework icon and select Japanese – Anthy.

You can now type in Japanese.

Click the Anthy crown icon to select between the various Japanese input modes.

That’s it. Setting up Japanese input on openSUSE 11.4 is not very difficult. When you try to type Japanese, make sure the cursor is in a text box in an application, or you may get an error saying No input window. Now enjoy your international Linux distribution.

Japanese Input on Fedora 15 Linux Gnome 3

Sunday, June 12th, 2011

Setting up Japanese input (IME) on Fedora 15 is easy and only takes a few minutes. However, it is a little different from previous versions because of the new Gnome 3 Shell user interface.

Fedora still uses the IBus keyboard input method system and uses the Anthy Japanese input method for the Japanese keyboard input, so it will be a familiar process to set up and use if you have done it on earlier Fedora Linux distributions. For Fedora 14 under Gnome 2, refer to this post.

This tutorial will get you up and running with Japanese input (IME) in just a few short minutes.

To start, open Activities from the Top Panel.

In the Search Box, type Input Method and select the Input Method Selector.

In the Input Method Selector screen, select Use IBus (recommended).

Press the Input Method Preferences button to open the IBus Preferences screen.

On the Input Method tab, check the Customize active input methods check box.

Press the Select an input method dropdown and select Show all input methods.

Press the Select an input method dropdown once again and now select Japanese → Anthy.

Press the Add button, and then press Close.

You must log out for the changes to take effect, so press the Log Out button on the Input Method Selector screen.

When you log back in you will now have the IBus input method framework button on the Gnome top panel (It looks like a small keyboard). This is the button to change input modes. Open a text editor such as gedit or some other application with a text input window.

Press the IBus input method framework button and select Japanese – Anthy.

The keyboard icon has now changed to Aち, which shows the letter A and the hiragana character chi, which probably is trying to get something close the the pronunciation of Anthy while indicating Japanese/English input modes.

You should now be able to type in Japanese.

Use the Anthy Aち button to toggle between Japanese, English, and other Japanese IME modes.

Note: When  I did this on Fedora 15 on my PC, after logging back in after changing the input mode, the display language was randomly changed to a different language. If this happens to you, just go to Region and Language from the System Settings and change it back to English or Japanese or whatever you prefer.

Note: If you get the message No input window when you try to select Japanese Anthy, make sure you have the mouse cursor in an application with a text input box, such as a text editor or a Web browser.

That’s it. You should be able to type in Japanese now. Even though the Gnome 3  Shell interface is new, you still set up and use Japanese input in a very similar manner.

Japanese Input on Ubuntu Linux 11.04 Natty Narwhal

Saturday, May 7th, 2011

This tutorial will show you how to set up Japanese input (IME) on Ubuntu 11.04 from the Unity interface. For Ubuntu 10.04 under Gnome, refer to this post.

To start, select Applications from the Unity Launcher.

From the Applications menu, select Language Support.

On the Language tab of the Language Support screen, press Install / Remove Languages…

On the Installed Languages screen, scroll down to Japanese and check Input methods and Extra fonts, then press Apply Changes.

Enter your password on the Authenticate screen.

It will take a few moments to download and install the Japanese IME packages.

Back on the Language Support screen, select ibus for the Keyboard input method system, and then press Close.

Once again select Applications from the Unity Launcher.

From the Applications menu, select Keyboard Input Method.

You may get a pop up message saying Keyboard Input Methods (IBus Daemon) has not been started. Do you want to start it now? Select Yes.

On the Input Method tab of the Ibus Preferences screen, press Select an input method and select Japanese → Anthy.

Press Add and then press Close.

The Ibus keyboard icon will now display on the top panel.

Open up any application with a text box such as Tomboy Notes and place the cursor in the text box.

Press the Ibus keyboard icon on the tap panel and select Japanese-Anthy.

The Ibus keyboard icon will now change to the Anthy Aち icon.

That’s it. You can now type in Japanese in Ubuntu 11.04. できましたでしょうか。


Virtualizing a Linux System (Creating a Linux VM P2V)

Saturday, March 5th, 2011

This tutorial article is going to show you how to create a Linux virtual machine from a physical Linux system. These instructions are generic enough to work with any Linux distribution, such as Ubuntu, Fedora, Red Hat, CentOS, Debian, Mint, etc.

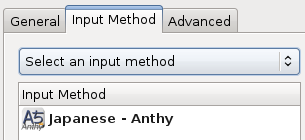
There are many reasons why you would create a VM of a physical system you have running. You might want to test out things before you try them on your actual system. It is useful when you are translating to have both the English and Japanese (or other language) OS and applications open side by side to reference the correct translations easily. Whatever the reason, this article will show you one way to do it pretty easily.

Overview of the Linux VM creation task:

Tools and Resources Needed

  • SystemRescueCd ISO file
  • Blank CD-ROM or USB disk
  • USB disk drive large enough to fit entire Linux system
  • VMware or VirtualBox

Preparation Tasks

  1. Make note of the disk partitioning
  2. Create a bootable Linux rescue disk

Main Tasks

  1. Image the hard drive partitions
  2. Create an empty Virtual Machine
  3. Recreate the hard drive partitions
  4. Restore the hard drive partitions
  5. Set up the boot loader

Final Task – Boot the VM

Optional Task – Configure X11

Preparation Tasks

Make Note of the Disk Partitioning

On the physical Linux system we want to virualize, run the df command to list the partitions and mount points

df -h

Make a note of the partitions, their sizes, and mount points. You will use this information later to recreate the disk partitioning in the virtual machine.

Create a Bootable Linux Rescue Disk

For the task of converting a physical Linux system to a virtual machine we are going to use another version of Linux to do the work in. Any bootable version of Linux will work, and I really like SystemRescueCd for this task. It is a light-weight Linux system that comes with all the system tools you’ll need for this job like partimage and fdisk (or GParted).

Download the SystemRescueCd ISO file.

Burn the ISO file to a CD-ROM, or follow the instructions to make a bootable USB stick.

Power down the physical Linux computer we are going to virtualize and put the SystemRescueCd in the CD-ROM drive or USB drive.

Turn the computer on and boot to SystemRescueCd Linux.

Main Tasks

Image the Hard Drive Partitions

Plug in your external USB hard drive.

Run the dmesg command to find the device name of the USB hard drive.

dmesg

Look for your hard drive name and description. For example, if you plugged in a Western Digital My Passport drive you should see something similar to this:

usb 2-1: Product: My Passport 070A
usb 2-1: Manufacturer: Western Digital
sd 4:0:0:0: [sdb] 1463775232 512-byte logical blocks: (749 GB/697 GiB)
sd 4:0:0:0: [sdb] Write Protect is off
sd 4:0:0:0: [sdb] Mode Sense: 23 00 10 00
sd 4:0:0:0: [sdb] Assuming drive cache: write through
sdb: sdb1

The key piece of information here is the sdb1 on the last line. This is the device name we will use to mount the USB hard drive.

Create a directory to mount the USB hard drive. For example, a new directory called flash.

mkdir /mnt/flash

Mount the USB hard drive, device sdb1, on the newly created directory.

mount /dev/sdb1 /mnt/flash

Run the partimage program to image the partitions.

partimage

Use the GUI to select the partition to image.

Press Tab and enter the file name for the partition. For example (Assuming the partitions are on device sda):

/mnt/flash/sda1.partimage.gz

Press F5 twice to navigate to the next screens and press OK to start the imaging process.

Repeat this process for each partition on the Linux system. Make sure to name the files appropriately.

Note: Partimage will also show the partitions of the USB drive you mounted. Do not image the partitions of your USB disk. Also, do not image any extended or swap partitions.

When you are finished imaging all of the disk partitions, unmount the USB disk drive.

umount /mnt/flash

Shut down SystemRescueCd and restart your Linux system.

reboot

Create an Empty Virtual Machine

Create a new VM in VMware (or VirtualBox).

Configure the VM to have similar hardware specifications as the physical Linux computer: RAM, processor, hard disk. It is important that the hard disk be the same size or larger than the physical machine so the partitions fit.

Set the VM to boot from the CD-ROM drive using the SystemRescueCd ISO file.

Boot the empty virtual machine into SystemRescueCd.

Recreate the Hard Drive Partitions

Run the fdisk command to find the hard drive device.

fdisk -l /dev/sda

If it is sda and your drive was around 100 GB, you will see something like this:

Disk /dev/sda: 105.2 GB, 105226698752 bytes

Use fdisk to recreate the disk partitions of the original physical Linux computer. You should have made note of these in the preparation tasks. fdisk is a command line program to partition the drive. (You can also use the GUI GParted program in X Windows if you prefer. Press startx and select GParted from the menu.)

fdisk /dev/sda

Press n to add new partitions.

Press a to toggle the bootable partition (the /boot partition).

Press t to toggle the swap partition by setting it to 82.

Press w to write changes to disk.

Press m at any time for a list of options.

Restore the Hard Drive Partitions

Plug in your external USB hard drive and connect it to the virtual machine.

Run the dmesg command to find the device name of the USB hard drive.

dmesg

Look for your hard drive name and description.

Create a directory to mount the USB hard drive. For example, a new directory called flash.

mkdir /mnt/flash

Mount the USB hard drive, for example device sdb1, on the newly created directory.

mount /dev/sdb1 /mnt/flash

Run the partimage program to restore the partitions.

partimage

Use the GUI to select the partition to restore.

Press Tab and enter the file name and location for the image file. For example:

/mnt/flash/sda1.partimage.gz

Press Tab and change the Action to be done to Restore partition from an image file.

Press F5 twice to navigate to the next screens and press OK to start the restore image process. In VMware you will probably have to press Function F5 to get the F5 key to work.

Repeat this process for each partition on the Linux system.

When you are finished imaging all of the disk partitions, unmount the USB disk drive.

umount /mnt/flash

Set Up the Boot Loader

The final step is to set up the boot loader and install it into the master boot record.

Mount the boot directory. For example, if sda1 is the boot partition and sda3 is the root partition.

mkdir /mnt/root
mount /dev/sda3 /mnt/root
mount /dev/sda1 /mnt/root/boot

Verify the configuration of the boot configuration file. Assuming you are using GRUB:

nano /mnt/root/boot/grub/device.map

Nano is a Linux text editor. You can also use pico or vi.

You want to verify that the device in the configuration file matches what it is in the VM. For example, if it says this:

(hd0) /dev/hda

You may need to change hda to sda. In this example we need to change it.

(hd0) /dev/sda

Exit Nano or whatever text editor you used.

Run grub-install to install GRUB into the MBR.

grub-install --root-directory=/mnt/root /dev/sda

Final Tasks

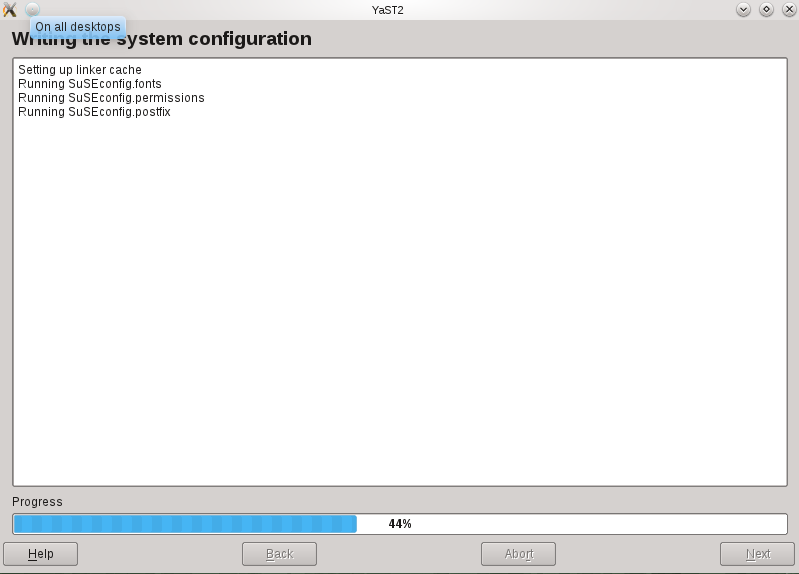
We’re all done. Now reboot in SystemRescueCd and your virtual machine should now boot into the same Linux setup that is on your physical machine.

reboot

This VM is now an exact copy of the physical Linux computer. You have successfully done a P2V (Physical to Virtual) conversion of your Linux system.

Optional Task – Configure X11

Depending on the version of Linux you are using, it may not be able to use the VMware settings to display X Windows properly. In that case, you will need to make a simple change to the X11Config file.

First, make a backup of the X11Config file. This assumes it is located in /etc/X11.

cp /etc/X11/XF86Config /etc/X11/XF86Config.backup2

Edit the X11Config file.

nano /etc/X11/XF86Config

Change the Driver and BoardName settings in the Device section from the VMware settings to a generic Vesa setting.

Section      "Device"
Identifier   "Videocard0"
Driver       "vesa"
VendorName   "Videocard vendor"
BoardName    "VESA driver (generic)"

Save the file and restart. You should be able to get X Windows to start now.

That’s it. It looks like a lot of steps, but it is not that difficult to do. The longest part is imaging and restoring the partitions.

Now that you have a virtual version of your Linux computer, you are able to do unique things like snapshots and work with multiple configurations or languages at the same time. This is really helpful when translating software from one language to another because you can now have both language versions running at the same time on the same desktop.

Japanese Input on Fedora 14 Linux

Sunday, February 20th, 2011

Fedora 14 is the quickest and easiest Linux distribution to get Japanese input working so you can type in Japanese. Fedora uses the IBus keyboard input method system and uses the Anthy Japanese input method for the Japanese keyboard input.

This short tutorial will show you step by step how to get Japanese IME setup on Fedora 14 in a few short minutes. There is noting to install—just a few menus to navigate and you are all set up to type in Japanese.

To start, select from the top panel SystemPreferencesInput Method


On the IM Chooser – Input Method configuration screen, click the check box to Enable input method feature.

Then click the Input Method Preferences… button.

On the IBus Preferences screen, select the Input Method tab.

Press the Select an input method drop down and scroll down to select JapaneseAnthy.

Press the Add button to add Anthy as the Japanese input method.

Press the Close button on the IBus Preferences screen.

Press the Log Out button on the IM Chooser – Input Method configuration screen.

Press Log Out on the Log Out popup window to log out of Fedora.

Log back in to have the new Japanese input method changes take effect.

You will now have the IBus input method framework button on the Gnome top panel. This is the button to change input modes. Open a text editor such as gedit or some other application with a text input window.

Press the IBus input method framework button and select Japanese – Anthy.

The keyboard icon has now changed to Aち, which shows the letter A and the hiragana character chi, which probably is trying to get something close the the pronunciation of Anthy while indicating Japanese/English input modes.

You should now be able to type in Japanese.

Use the Anthy Aち button to toggle between Japanese, English, and other Japanese IME modes.

That’s it. Now you can type in Japanese, as well as quickly toggle between English and Japanese on the fly in Fedora. As an added convenience, the IBus input method remembers individual preferences per application. So if you are typing Japanese in gedit, but writing an email in English in Firefox, you can switch between the applications and IBus will give you the correct input method that you last used in that application.